This post may contain affiliate links. Please read the full disclosure here.
Raita is an Indian accompaniment made using yogurt as the main ingredient which is either spiced up or kept plain. Raw or cooked vegetables, fruits or Indian crispies such as boondi or shev are added to this yogurt.
Raita is a healthy & delicious accompaniment to many Indian dishes such as Biryani, Theplas, Parathas, Curries or as simple as everyday dal rice sabzi.
Boondi are small tiny gram flour balls that are deep-fried in oil. They can be made at home or also easily available at any Indian Grocery store.
You will find two varieties of boondi’s that are extensively prepared in India. One is plain salted boondi and the other is spiced boondi whichi is really spicy and flavorful. You may use either of these varieties for this recipe.
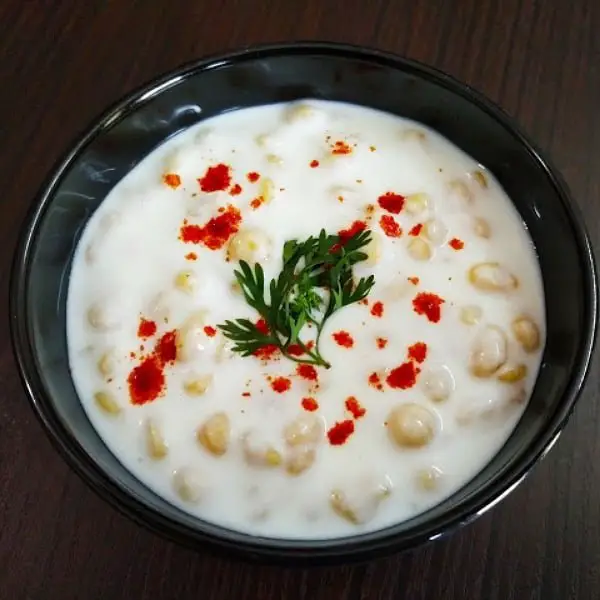
Boondi Raita means whisked yogurt that is spiced and infused with soaked boondi’s. Boondi’s are often served in Indian Chaat Snacks such as pani puri, dahi puri, dahi vada to name a few.
To make dahi boondi, whisked yogurt is used for that smooth silky texture and spices such as cumin powder, chaat masala, red chilli powder are added for that chatpata flavor.
You may use homemade yogurt or store bought. I normally prefer homemade full fat yogurt for raita recipes. Do not use slimy yogurt or very runny yogurt for this recipe.
Boondi’s are soaked in warm water for 15-20 minutes till they become soft and loose their crispness. Then are squeezed in between the palms to get rid of excess water and added to the yogurt. When soaked it also helps to get rid of excess oil from the boondi’s.
Boondi raita is not like other raita’s which are made using raw vegetables that are quite healthy and easy to store for next day. If you are on a weight loss journey then try other options instead such as cucumber, onion, carrot to name a few.
I personally don’t like to soak boondi and instead add the crunchy boondi in the chilled yogurt mixture. Love the crunch! eventually the boondi do go soft a little bit when mixed with the yogurt.
I used chilled yogurt for this recipe. In summer, just having a bowl of this chilled boondi raita during lunch is the soothing and best way to beat the heat.
Apart from having it with spicy biryani’s and curries, you can serve this simple and easy raita with everyday meal such as methi thepla, aloo paratha, dal, rice, sabzi, moong dal khichadi to name a few.
The best way to eat this raita is just after adding the boondi in yogurt. In case you are planning to prepare this raita ahead of time then just whisk the yogurt add the spices and keep yogurt in the refrigerator. Add the boondi just before serving.
In case you want to use boondi without soaking, you may add boondi to the yogurt and keep it in the refrigerator for 15-20 minutes so that it gets soft.
Yogurt being rich in calcium and protein is a healthy ingredient that should be included in everyday diet.
The best way to have this boondi raita is to serve it immediately. I would highly recommend not the store this boondi raita for the next day or so as it will get thicker and soggy which loses its taste and texture.
Sometimes instead of adding spices like chaat masala, cumin seed powder I just add little sugar, salt, and fresh black pepper powder. When adding salt to raita make a note that the boondi already contains lots of salt so adjust the salt accordingly.
In case you want to have vegan dahi boondi raita then use vegan curds such as coconut, almond, soy, oats.
This boondi raita is simple to make and taste delicious. It is one of the most famous raita in India.
Let’s see how to make dahi boondi recipe that is simple to make and tastes delicious.

Serves: 3 Persons
Prep time: 10 minutes
Cook time: 0 minutes
Cooking level: Easy
Taste: Mild
- 1 1/2 Cup Boondi
- 2 Cup Yogurt
- 1 teaspoon Red Chilli Powder
- 1 teaspoon Jeera Powder
- Salt to taste
- 2 teaspoon Sugar (Optional) or if yogurt is too sour
- 1/4th Cup Water
- Soak boondi in lukewarm water for about 10 minutes.
- In a mixing bowl add yogurt and whisk well, add 1/4th cup of water and whisk again till the curd is smooth.
Featured Recipe Video – Sabudana Kheer (Tapioca Pudding)
- Add the spices and mix well.
- Once the boondi is soft, squeeze the boondi in between your palms lightly till the extra water is removed . Do not squeeze tightly otherwise the boondi will break.
- Add boondi to the yogurt and mix well.
- Boondi Raita is ready to serve.

Yummy